Image Guidelines
To turn your image into a custom screen for printing, I’ll make a simple adjustment that turns your colour or greyscale image into black and white. You’ll have a chance to see your adjusted image before I make the screen, in case you’d prefer to go with a different one.
Creating Your Design
There are so many ways to create a design for screen printing. You can take a photograph, create something in Word, or draw something by hand with a sharpie or india ink and send along a scan or photo of your creation. As long as I receive a digital copy in either jpg, png, pdf or doc format, I can work with it.
Email your image to carolyn@meandc.ca.
What You Need to Know
A few things to keep in mind:
I can only get so much fine detail with the silk screen mesh I use. I’ll do what I can and you’ll have a chance to review the image before I make your screen.
If you’re sizing the image yourself, make sure it will fit on an 11” x 14” screen. If I’m sizing it, let me know approximately what size you want it (small or large) and I’ll use my best judgement. Yes you CAN send multiple images, as long as they’ll fit on one screen.
High resolution images (150-300 pixels/inch) make a big difference. Lower resolution images can work too, they just won’t be as clean.
Images can look really different printed with light coloured ink verses with dark coloured ink. When you print with light ink, it’s like looking at a negative of an image (see example below).
Most importantly, and this is key: have fun with this part! Keep an open mind. Sometimes the coolest designs are the ones that aren’t at all what you intended them to be.
What To Expect
Here are a few examples of images and what they look like once I’ve adjusted them to be black and white:
High quality, high contrast
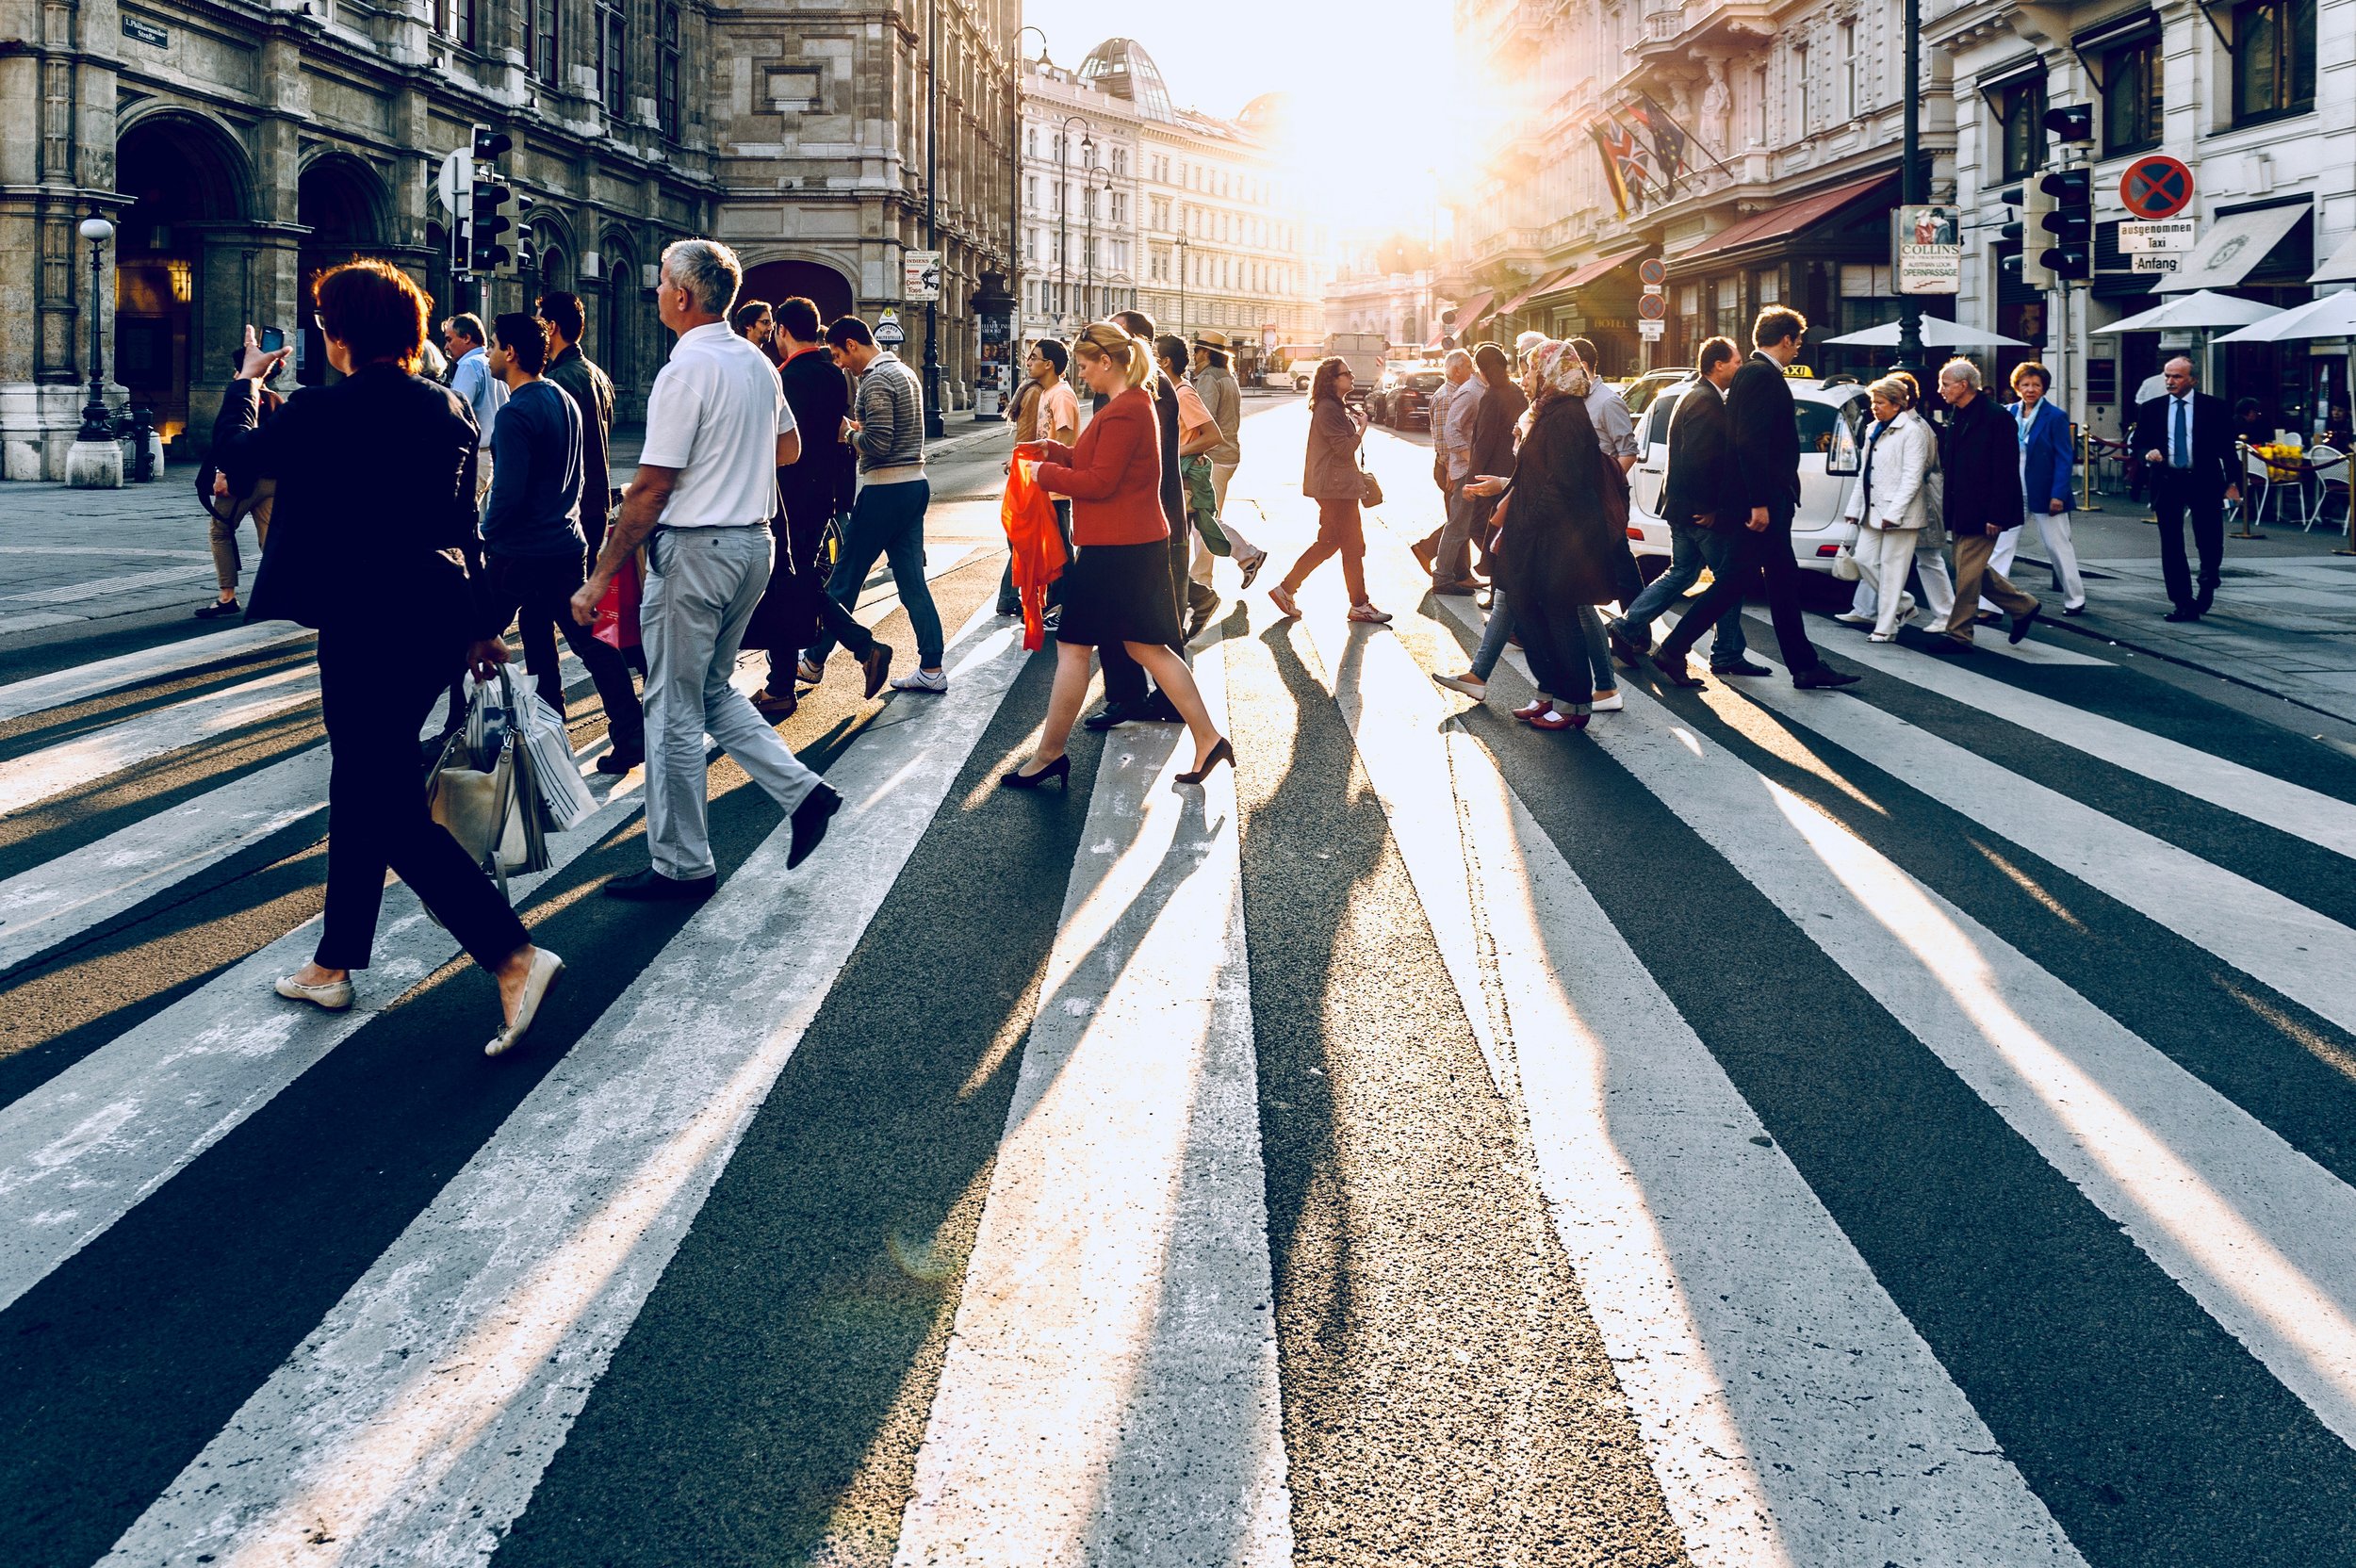
This is a cool, high quality image and there’s a lot of contrast which translates well into black and white (Photo by Jacek Dylag on Unsplash).

This image would make a great screen. You likely wouldn’t get all the detail in the buildings but it would still look cool when printed.
Dark background

Despite the dark background, because this is a high resolution image, the light on the back, face and antlers will add visual interest (Photo by Ken Treloar on Unsplash).

I love the glowing antlers! We’d lose some of the fine detail in the eyes and some of the shaded areas, but I think it would still read well.
Shadows #1
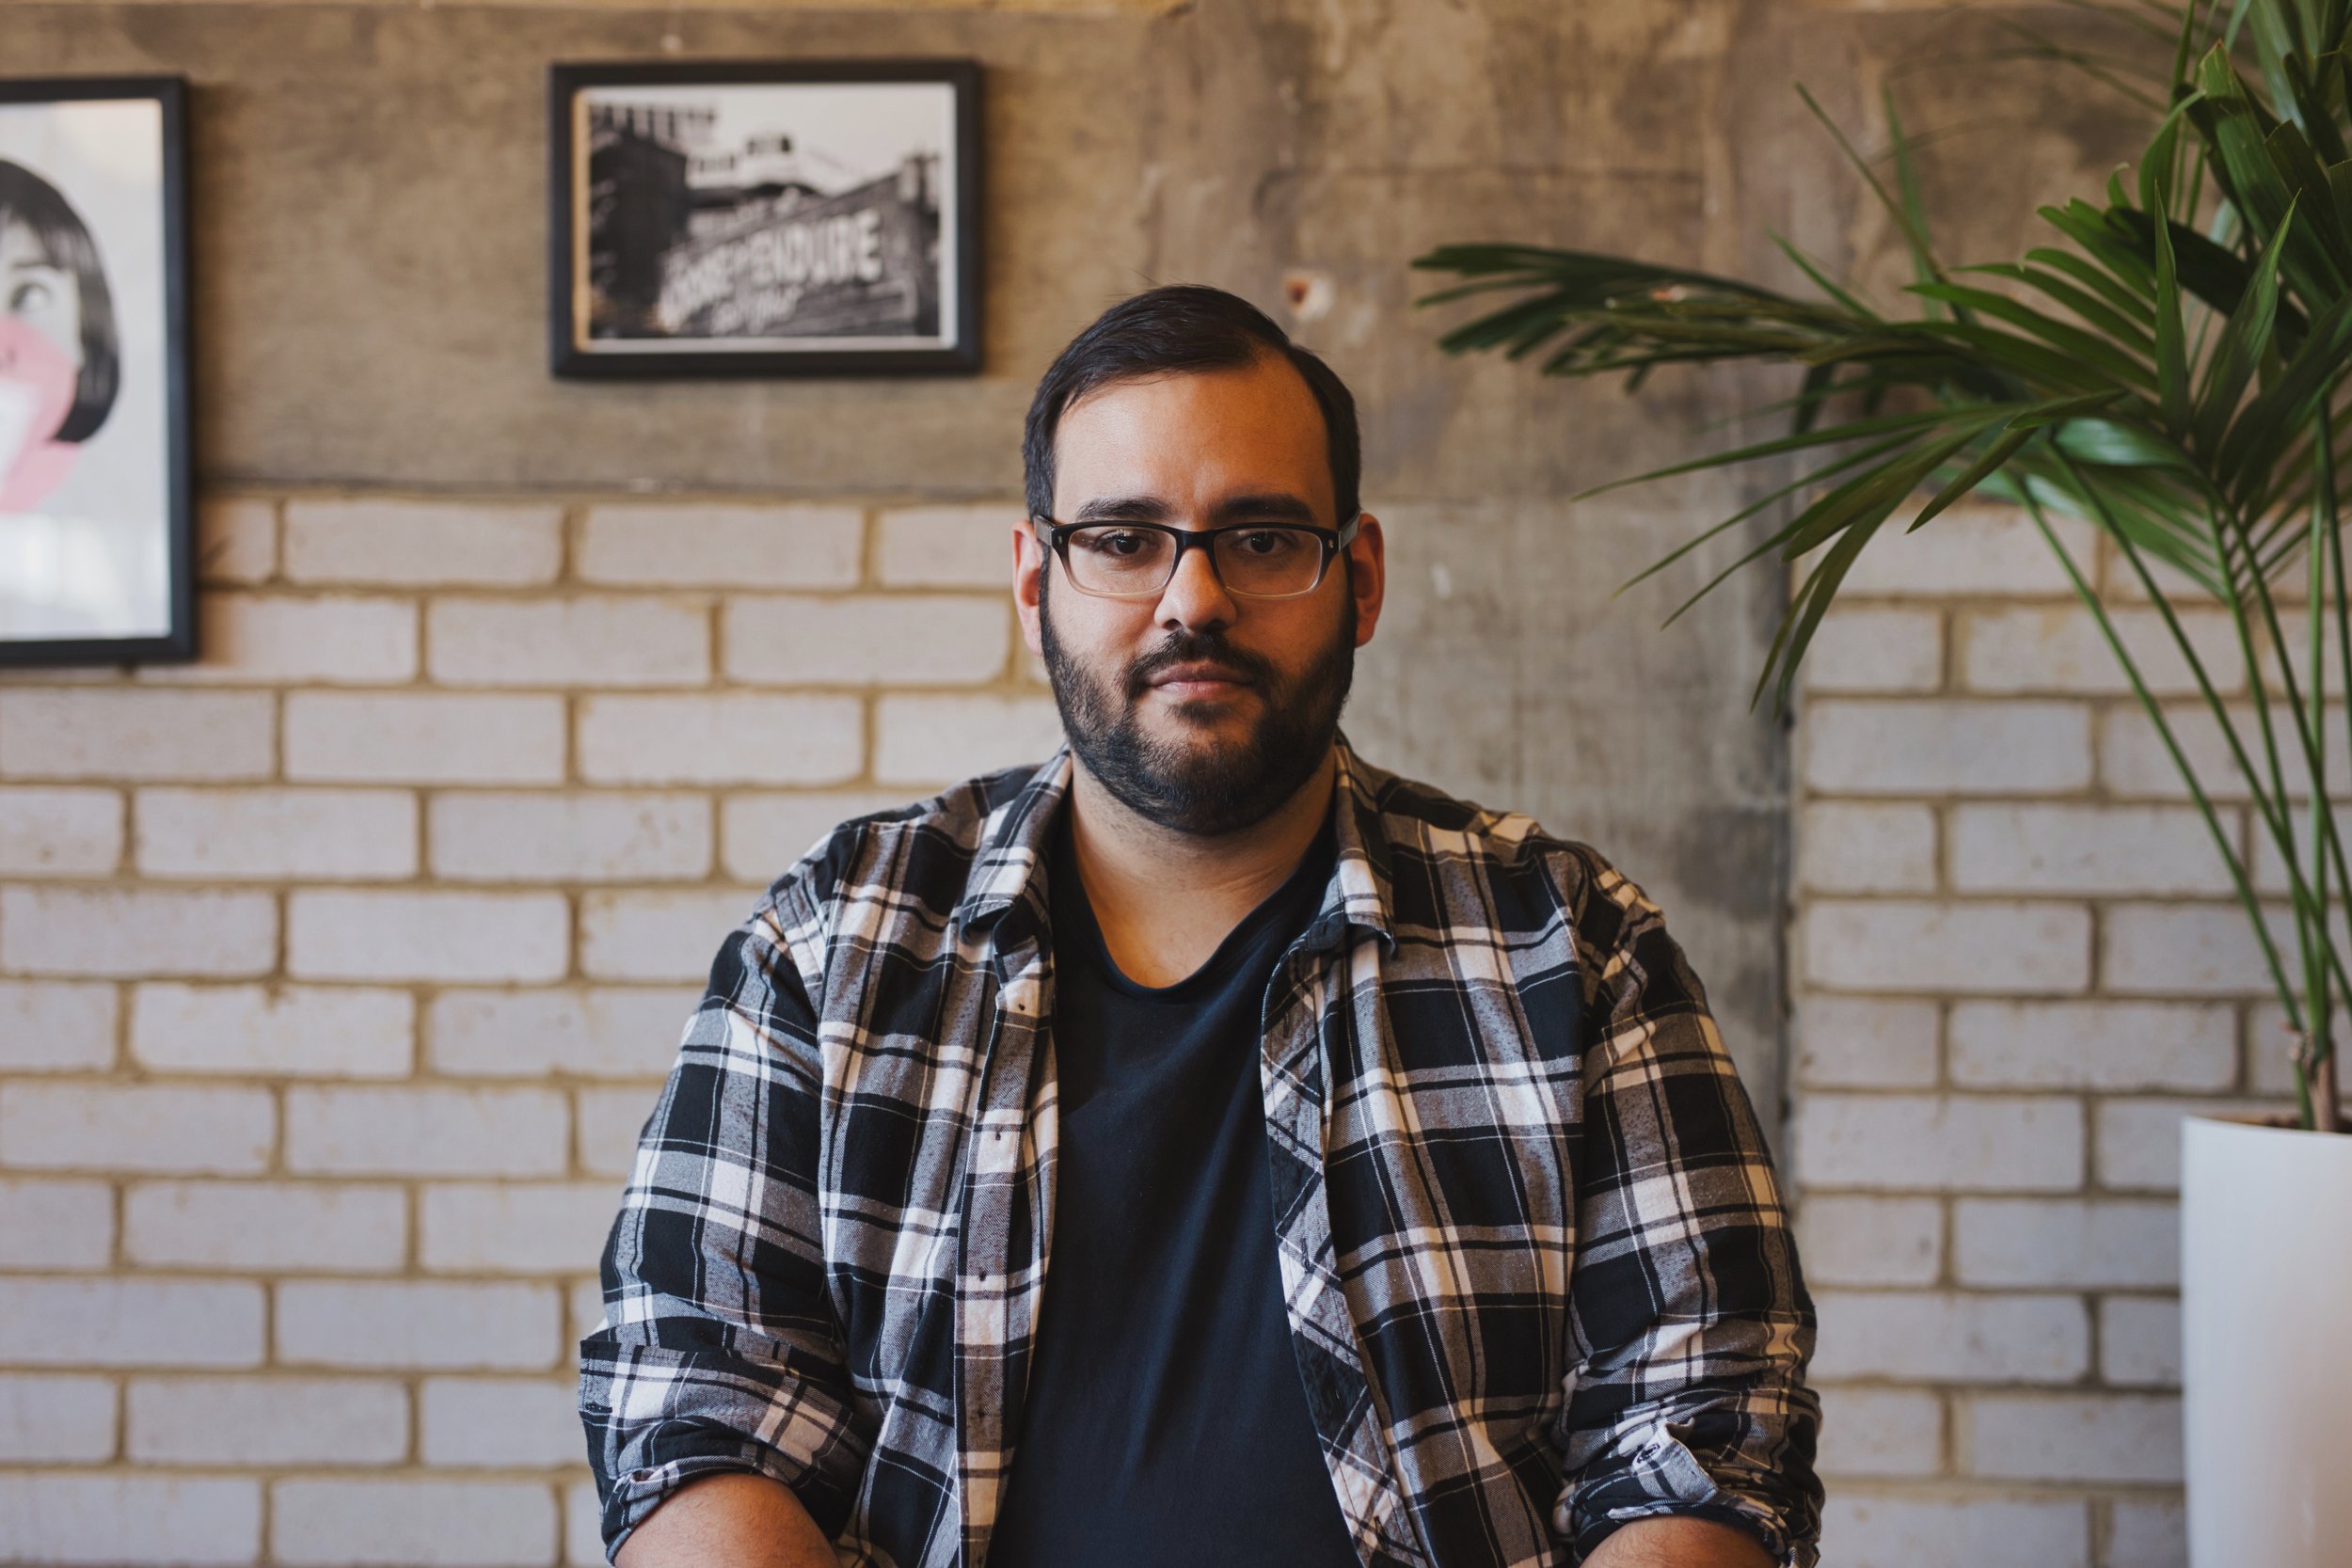
There are some shadows on the face here and the background is a little dark, but sometimes shadows can create a cool effect (Photo by Harps Joseph on Unsplash).

I had to lighten up on the shadows a bit so the whole side of his face wasn’t black. We lost the brick detail, but the plant and pictures are cool.
White ink on dark background

Another high quality image with good contrast that would make a fun design (Photo by Eye for Ebony on Unsplash).

An example of how using white ink verses black ink can transform an image. If you’re printing white on dark and don’t want the negative look, I can invert the image for you.
Hand drawn images

Posters make very cool prints. This one incorporates hand drawn elements, which you can totally do! Use a sharpie or india ink, something dark (Photo by Annie Spratt on Unsplash).

Can’t you just picture this on a t-shirt or a tote? I love the textures. Again, you might lose some details here but the majority of it will come through.
Shadows #2
When you have a light face and dark body like this, switching it to black and white can look unusual… which isn’t necessarily bad (Photo by Marko Blažević on Unsplash).

I played with the levels to try and bring out more detail in the body but it lightened up the head too much. There are ways around this, but not when you’re doing a quick edit to black and white.